Archives For Vorsprung durch Technik

I had the problem that the contacts in the Address Book app were not syncing probably with my business Exchange account. Here is how I fixed it:

  1. Close contacts app
  2. Remove all iCloud and Exchange accounts in System Preferences > Internet Accounts
  3. Remove everything in ~/Application Support/AddressBook
  4. Add Exchange and iCloud Accounts again in System Preferences > Internet Accounts


Mounting shares on my Synology NAS via AFP was very unstable and sometimes shares were disconnected for no real reason, so I finally decided to move to SMB. AFP is deprecated anyway and even Apple suggests to move to SMB. While I usually had 100MB/s transfer speeds on AFP, I only got around 30MB/s on SMB. So after some research I found the following solution:

  1. Set SMB version to SMB V3 on the Synology (File Services > Windows > Advanced)
  2. Disable “SMB Signing” on your Mac clients by creating /etc/nsmb.conf:
#> sudo vi /etc/nsmb.conf
[default]
signing_required=no

blog-fb-video

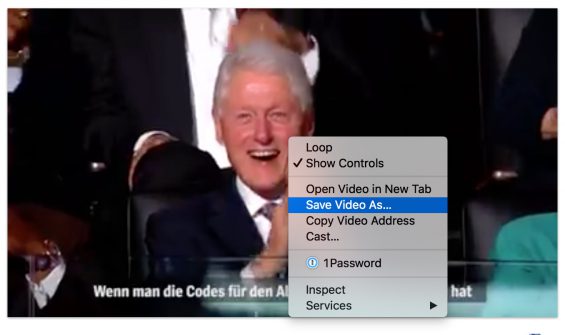
If you try to download a video from Facebook to your local hard drive, you will realise, that you can’t just right-click on it as you would do with videos on other sites or images. However, there is an easy and free way of saving a local copy of that video:

  1. Find the URL to the single post. The easiest way is to right-click on the timestamp close to the top left corner. It says how many minutes, hours or days the video was posted and copy the link to your clipboard.
  2. Past the URL into a new browser window or tab, but do not press Enter, e.g.; https://www.facebook.com/spiegelonline/videos/10154407205429869/
  3. Change the “www” in the URL to “m”, e.g.: https://m.facebook.com/spiegelonline/videos/10154407205429869/ and press Enter so that you get to the mobile version of this Facebook post
  4. Click play on the video
  5. Right-click “Save as” on the video.
  6. Done

Mixed Messages

Julian —  18. August 2015 — 1 Comment

MixedMessages

Hacking the Sonos

Julian —  19. April 2015 — Leave a comment

IMG_1702

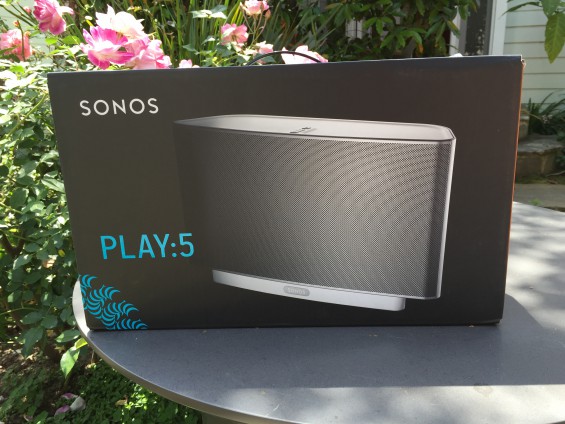
Just a few links and ideas, that I found while playing around with my Sonos:

Status and lots of data about your Sonos player

  • Open “About Sonos” in your controller to get the IP addresses of all your devices
  • Open http://<sonos.ip.address>/status to get all sorts of info about the player

Watching traffic between controller and player

  • Download Wireshark and configure it (no, I can’t help you with that)
  • Add a rule to “Analyze > Decode As …” that matches TCP port 1400 to HTTP
  • Start capturing with a filter “host <sonos.ip.address>”

Misc Links


egoFM RAW Stream URLs

Julian —  6. February 2015 — 6 Comments

Ich hatte hier schon mal einen Beitrag mit den URLs zum Stream von egoFM veröffentlicht. Anscheinend gibt es jetzt einen neuen RAW Stream von egoFM. Da kommt nur die Musik ohne Werbung und das ganze andere Gelaber. Ein Kommentator hatte mich gefragt ob ich da auch die URLs dazu habe. Hatte ich nicht, aber da sie im Quelltext der egoFM Webseite stehen, war es nicht schwer etwas zu finden:

http://mp3ad.egofm.c.nmdn.net/ps-egofmraw_128/livestream.mp3
http://mp3ad.egofm.c.nmdn.net/ps-egofmraw_192/livestream.mp3

Viel Spaß beim ungestörten Hören.

If you try to install the latest (as of today) Plex package for Synology on the brand new DS1815+) it will fail and tell you that you that this hardware architecture was not supported. That is not true, because the DS1813+ uses the same processor architecture as its predecessor. However Synology uses a different codenames to refer to the newer models. But for external software like Plex they still look the same. So all you need to do is to add the new codename (“avoton”) to the configuration file of the Plex package.

Here is a short walk through:

  1. Get a good archiving program that can handle “tar” files. On the Mac I used BetterZip which worked perfectly
  2. Download the latest Plex for Synology (Intel) package from Plex here
  3. Open the file with the archiving program and copy the file named “INFO” to your computer
  4. Use your favorite text editor and look for the line that says
    • arch=”x86 bromolow cedarview”
  5. Add “avoton” at the end of that line, so that it reads
    • arch=”x86 bromolow cedarview avoton”
  6. Copy that file back into the archive and make sure that the change actually ends up in the package
  7. If your archiving program uses another file extension, change it back to “.spk
  8. Open Package Center on the DS1825+, chose “Manual Installation” and upload the modified package

Works like a charm. If not you need to allow 3rd party software on the Synology or your archiving program changed the package too much, when it created the new package. Try a different archiver or unpack the whole thing, change the “INFO” file, create a new tar archive and rename the extension to “.spk”.

If you are too lazy to do it yourself, you can download my changed package here.


Disclaimer: I saw in older posts in the Plex Forum, that they do not mind if someone redistributes slightly changed packages to help others, as long as a) it is clear that the software belongs to Plex and not me, b) you still obey all their legal terms and b) you are aware that this totally unsupported by Plex, myself or anyone else in his right mind. I just do this as a favor for all of you who are as lazy as I am. But I am happy to delete the file faster than a lawyer can spell “Cease and desist letter” if Plex is not OK with the download. If you install this, you are doing it on your own risk. I am not a developer and I might have made all sorts of mistakes. It might kill your canary bird, give your grandmother diarrhea for weeks and turn your Disk Station into a well designed spice shelf. It works flawless on my Disk Station, so you will probably be safe, but I also can’t guarantee that these awful things will NOT happen to you.

If you use a bluetooth headset and did update your Apple Computer to Yosemite, you probably also discovered that the sound starts to lag after a few minutes or when the computer just woke up from hibernation mode. With OSX 10.10.1 being the latest version, there is still no real fix available. The only option right now is to install the latest beta version of 10.10.2. I did that a few day ago, the bluetooth issue is fixed and I also did not experience any other problems.

All you need to do is switch the App Store to the beta channel by copying the following instructions into terminal and enter your admin password:

sudo /usr/sbin/softwareupdate --set-catalog https://swscan.apple.com/content/catalogs/others/index-10.10seed-10.10-10.9-mountainlion-lion-snowleopard-leopard.merged-1.sucatalog.gz

Afterwards start or restart the App Store and search for updates. It should give you the option to install 10.10.2 (Beta 3 / Build 14C81f) just like any other OSX update. It takes about 5 minutes to download and 10 minutes to restart and install. The bluetooth audio lag should be gone.

Update: My version numbers where .1 too high, so I changed that back to the real numbers.

I have a Synology DiskStation DS1815+ since a few weeks now and I already got annoyed with Chrome Browser warning me about the self signed SSL certificate. So I installed a free AND valid certificate from StartSSL to get rid of the warning. Here are the steps you need to take (yes, it is a very short howto):

  1. Go to https://www.startssl.com/ and sign up.
  2. They use certificates to authenticate you, so you need to install the certificate, when your browser asks you to do so
  3. Make a backup of that certificate. In Chrome, go to “Extended Settings” and click on “Manage Certificates” in the “HTTPS/SSL” section.
  4. On the Mac it will open the keychain tool. Select the “login” keychain and the “certificate” category.
  5. Find the certificate that is named like your eMail address and make sure it has an “www.startssl.com” private key attached to it
  6. Export the certificate as “.p12” file and save it in a secure place
  7. Start the “Validation Wizard” and prove that you are the owner of your domain (It sends an eMail with a verification code to the hostmaster eMail address)
  8. After you have validated the domain, start the “Certificate Wizard”, enter a strong password for the new certificates private key and leave the rest untouched.
  9. Copy the encrypted key to a local text file, e.g. “mydomain-key.txt”
  10. After that the certificate is created, but usually you can’t download it immediately
  11. In the meantime, go to the “Toolbox” menu and click on “Decrypt Private Key”
  12. Copy the key you saved before and the password into the boxes
  13. Save the decrypted key in another local text file, e.g. “mydomain-key-decrypted.txt”
  14. When you receive the eMail that your certificate is ready, click on “Retrieve Certificate” in the toolbox section and save it too. E.g. “mydomain-cert.txt”
  15. The last step is to download the StartSSL intermediate certificate from “StartCom CA Certificates” also in the toolbox area. The link is called “Class 1 Intermediate Server CA” and the file name should be “sub.class1.server.ca.pem” after you downloaded it.
  16. Now you can go to your Synology: Control Panel > Connectivity > Security > Certificate and click on “Import certificate”
  17. Upload the three files (certificate, the decrypted key and the intermediate certificate) and you are done

After logging out, closing the browser window or tab and logging back in, you should see no more SSL warnings.

ItSeenByIt

(via @puppetmasterd)